When you delete files in Windows, they are usually considered gone forever. However, under some conditions, a few files (or segments of files) might still be recoverable using special data recovery software. If you work with sensitive information on your computer, you should know that these files could be recovered.
For this reason, this tool allows you to securely and permanently delete files.
Installing the Eraser tool
- Download the Eraser installer.
- Double-click the install_eraser file, typically located in your Downloads folder.
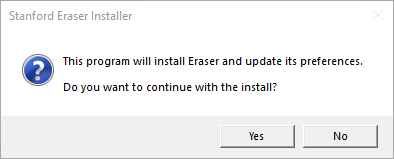
- When prompted to continue with the installation, click Yes.
- When the installation is finished, a shortcut to Eraser
 is added to your desktop.
Using the Eraser to permanently delete files
- To erase a file or folder, right-click the file or folder, hover over Eraser, and then click Erase.
Note: Files deleted in this manner will not be recoverable by Data Recovery software or undelete programs.

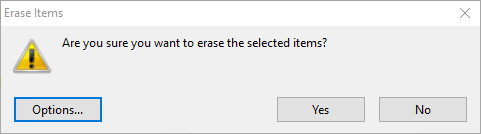
- Click Yes to confirm that you want to erase the selected items.
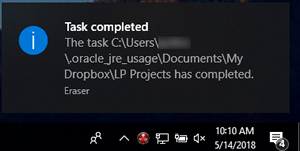
- A notification appears in the system notification area when the task is complete.
Note: For more information about using Eraser, right-click the Eraser icon ![]() on your desktop, click Open and then click Help in the menu bar.
on your desktop, click Open and then click Help in the menu bar.