Overview
You can create a spam filter to automatically filter or delete email that has been labeled as spam by the Stanford spam filters.
The number of "#" signs (pound or number signs) after the word "Spam:" indicates how sure the system is that your email qualifies as spam. By default, all email marked with five # symbols is discarded before it reaches your mailbox. All mail marked with four # symbols is filed into a folder labeled Junk Email that can be accessed via Webmail or an email program. Messages more than 30 days old are automatically purged from your Junk Email folder.
The following instructions show you how to create a spam filter that filters email marked with three or more # symbols into the Junk Email folder. You can make the filter more sensitive to spam by choosing to filter messages labeled with one or two # symbols.
You can choose to have messages discarded rather than moved to the Junk Email folder. However, the Stanford spam filters are not perfect. Legitimate email occasionally gets labeled as spam. Such mail usually gets a "[SPAM:#]" or "[SPAM:##]" tag. If you do choose to discard messages tagged as spam, that email is gone forever and cannot be restored.
Creating a spam filter
- If you haven't already done so, go to webmail.stanford.edu and log in to your webmail account.
- Click Settings (the gear icon in the upper-right corner) > Options.
- In the Options panel, navigate to Mail > Inbox and sweep rules.
- Under Inbox rules, click the plus sign (+) to add a new rule.
- Enter the following information in the New inbox rule dialog box:
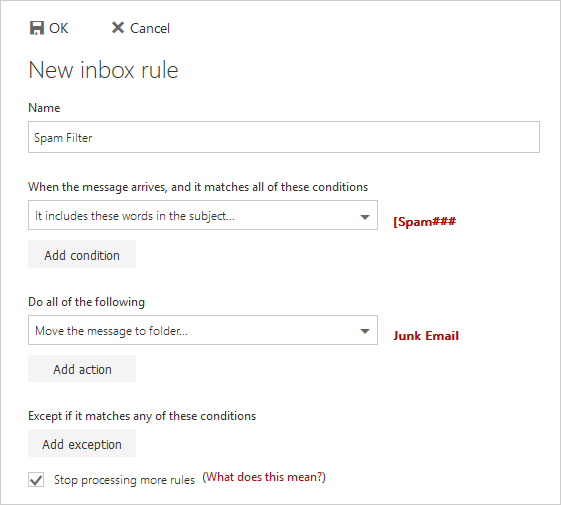
- Name: Spam Filter (or whatever name you want to call this filter)
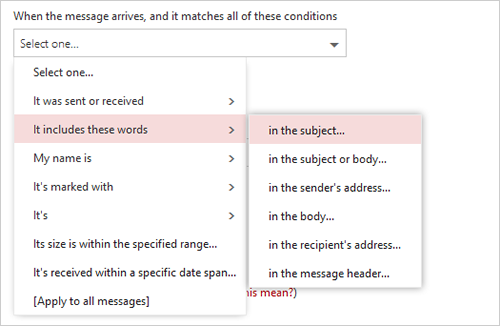
- When the message arrives, and it matches all of these conditions: It includes these words > in the subject...
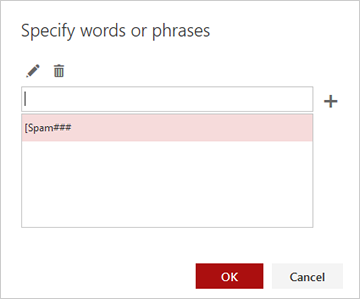
- Specify words or phrases: enter
[SPAM:###and click the plus sign then click OK.
- Do all of the following: Move, copy, or delete > Move the message to folder
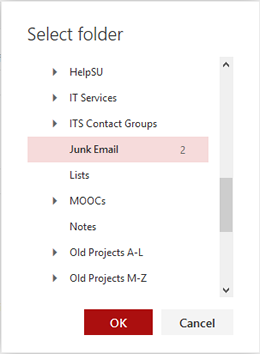
- In the Select folder dialog box, select Junk Email and then click OK.
- Stop processing more rules: checked (this prevents additional filters from being applied to a message after the first match so as to avoid contradictory actions)
- Click OK to save your spam filter.
- If you see a warning message about using Outlook Web App or Windows PowerShell to modify your rules. Click OK to save your webmail spam filter.