File transfer applications
The following secure methods for publishing, posting, and transferring files over the Stanford network are available:
- AFS mounting: OpenAFS for Stanford
- SFTP (Secure File Transfer Protocol): SecureFx
Note: Stanford does not support unsecure FTP.
Publishing using OpenAFS (Windows)
This can be done by mounting the AFS folder you want directly on your computer, thereby creating a virtual connection to the network. This creates a folder, known as a "network folder," which you can use as you would any other Windows folder: you can create, name, move, copy, select, delete, rename, print, and search for AFS files and directories on your computer. You won't need to FTP or "Put" files when you want to publish them.
Notes:
- OpenAFS for Windows is available for download at OpenAFS for Stanford.
- See the Install Stanford OpenAFS for Windows page for information about installing OpenAFS. Instructions are also available for mounting AFS volumes and managing PTS groups.
- You should be logged in to Kerberos for Windows prior to launching OpenAFS.
- Launch the Stanford AFS Controller app.
(If Stanford Desktop Tools (SDT) is installed, you can launch OpenAFS by right-clicking the SDT icon in the notification area and then clicking Mount AFS Volume. )
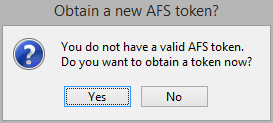
- If you are not logged in to Kerberos an "Obtain a new AFS Token?" message displays. Click Yes.
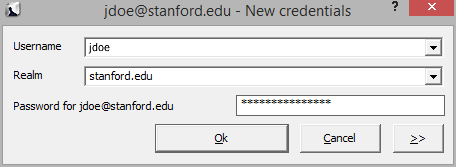
- Enter your SUNet ID and password in the New credentials window and then click OK to obtain an AFS token.
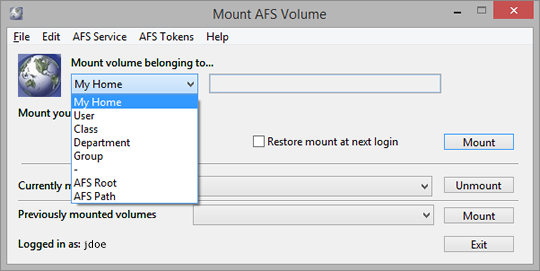
- When the Mount AFS Volume window displays, select the AFS space where you wish to publish items from the Mount Volume belonging to drop-down list box.
- To publish to your personal web space, select My Home.
- To publish to someone else's personal web space, select User.
- To publish to a class web space, select Class.
- To publish to a group web space, select Group.
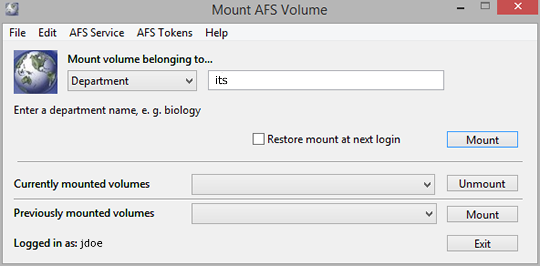
- To publish to a departmental web space, select Department.
- Enter the appropriate directory name and click the Mount button. (You do not need to enter a directory name for My Home.)
- The AFS directory automatically opens in File Explorer and the directory will be added as a new drive. You can drag and drop files from your computer to this folder to publish them.
- When you are done publishing you can close your volume's window, then exit the Mount AFS Volume window. Or, you can select the volume you have open from the Currently mounted volumes and then click Unmount.
Publishing using SecureFX (Windows)
SecureFX is a Windows application that lets you securely transfer files between computers using a format called the SSH (Secure socket SHell) protocol. It is used to move HTML, graphic, and other files from personal computers to the server computers, which make them available to the web.
To download SecureFX:
- Go to the SecureFX page to download the software.
The Stanford community can download and use SecureFX free of charge.
- Follow the SecureFX configuration instructions.
SecureFX has pre-configured SSH2 connections to Cardinal and Corn—the most widely used University IT-supported servers.
Using SecureFX to publish files to a personal web folder
- Launch SecureFX.
- Click either cardinal.stanford.edu or rice.stanford.edu, and then click Connect.
Note: If you prefer to use another server, see Adding sessions on the Configuring SecureFX web page for instructions.

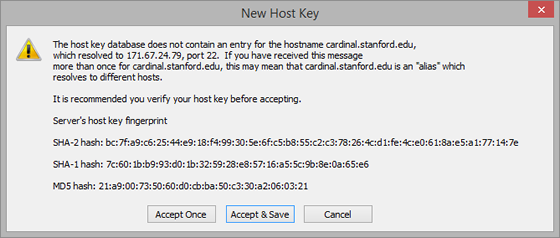
- If the New Host Key dialog box is displayed, click Accept & Save to establish a secure connection to the server.
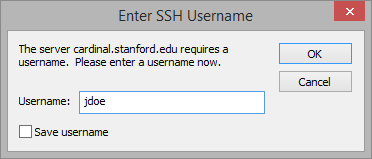
- In the Username field, enter your SUNet ID and click OK.
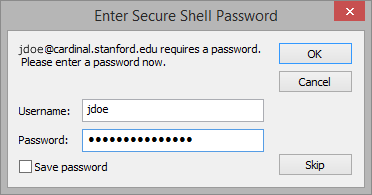
- In the Password field, enter your SUNet ID password and click OK.
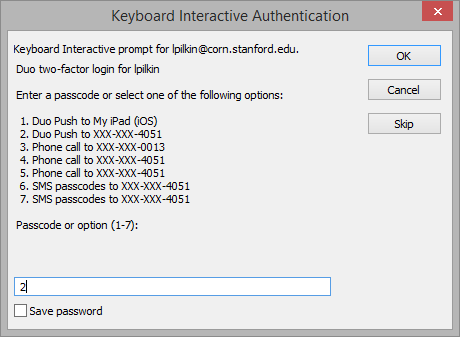
- Next your may be prompted to enter a two-step authentication code. You can either enter a passcode or choose one of the other methods listed for authenticating. If you select to have a code delivered by SMS text message, select the menu item for SMS then enter the code at the next prompt.
- If you are connecting to Cardinal or Corn, your desktop and your AFS home folder are displayed in separate tabs. Double-click the WWW folder in your AFS home folder.
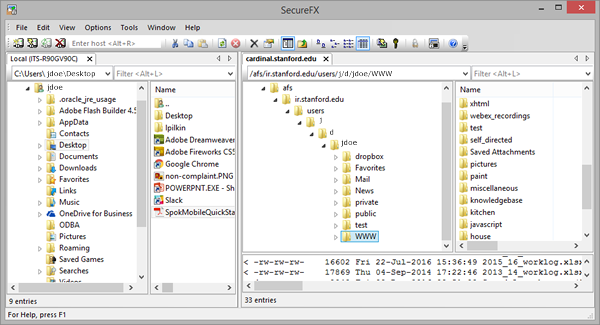
- Navigate to the folder where you want to publish your files. You can drag and drop, copy and paste, or manually upload files from your desktop to this folder to publish them.
Using SecureFX to publish files to a group or department web folder
- Connect to your personal AFS web folder as described in the procedure above.
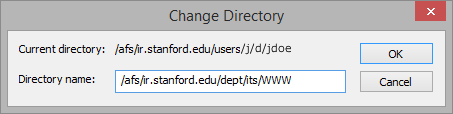
- On the File menu, click Change Directory.
- Enter the AFS path for your department or group web folder and click OK.
Examples: /afs/ir/dept/dept_name/WWW (department folder) or /afs/ir/group/group_name/WWW (group folder).
- Navigate to the folder where you want to publish your files. You can drag and drop, copy and paste, or manually upload files from your desktop to this folder to publish them.
Other useful features in SecureFX
Adding directories (folders):
- Under the File menu, point to New and then click Folder.
- Enter the new folder's name and click OK.
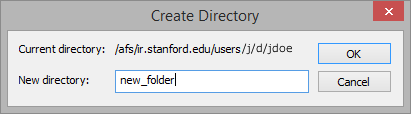
Note: Web directory names generally are in all lowercase and are ALWAYS only one word. If two or more words are needed, they may be made into one word, or separated by a dash or underscore ("newfolder," "new-folder," or "new_folder," but not "new folder").
Deleting files and directories (folders):
- Select the file(s) or folder(s) you want to delete.
- Under the File menu, click Delete.
- You'll be prompted to confirm that you wish to delete the file. Click OK.
Renaming files and directories (folders):
- Select the file(s) or folder(s) you want to delete.
- Under the File menu, click Rename.
- Enter the new name and press the ENTER key on your keyboard.