Before you begin
To access Stanford's wireless network, you will need the following:
- A valid SUNet ID or wireless guest account*
- Your Windows 7 computer
- An 802.11g, 802.11n, or 802.11ac compatible wireless adapter (802.11n devices revert to the 802.11g standard)
*If you do not have a SUNet ID, please follow the instructions on the Access for Stanford Visitors page.
Register your computer
for Faculty and Staff, and Students living off-campus
You should see the Stanford Network Self-Registration page when you first attempt to connect your computer to the Stanford Network. The following instructions walk you through the self-registration process; if for any reason they don't work for you, contact your Local Network Administrator (LNA) or submit a Help ticket. See Getting additional help at the end of this page for details.
Students living in an on-campus residence: From your on-campus residence, register your computer at iprequest.stanford.edu.
- From within a Stanford wireless-enabled location, connect to the Stanford wireless network (for assistance, see Connect to Stanford's wireless network), open a web browser and point it to any page.
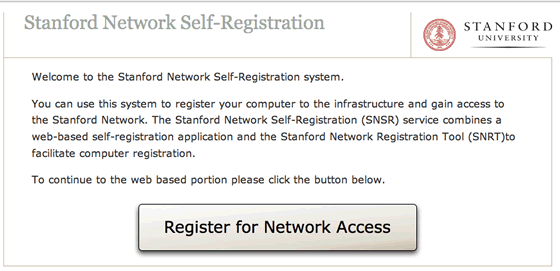
- Instead of your target URL, the Stanford Network Self-Registration page is displayed. Click Register for Network Access.
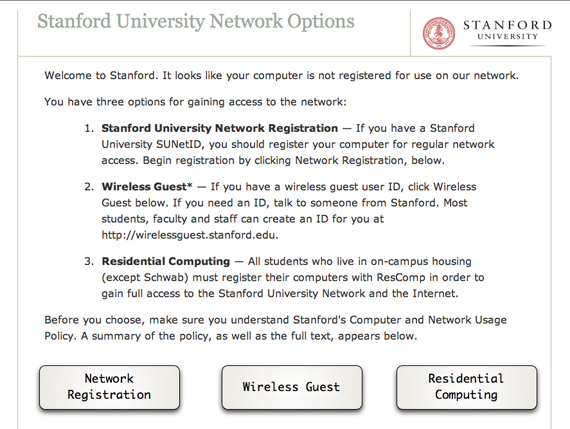
- Next, the Stanford University Network Options page is displayed. Click Network Registration.
- When the login screen is displayed, log in with your SUNet ID and password.
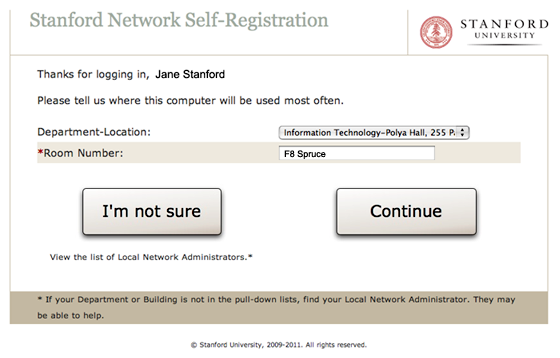
- Next you will be asked to choose where the computer will be used most often.
- Department-Location: select the department or location that most closely corresponds to where you will typically use the computer (required).
- Room Number: enter your room or office number (required). If you don't know the exact room or office number, enter a very brief description of where you will be using the computer.
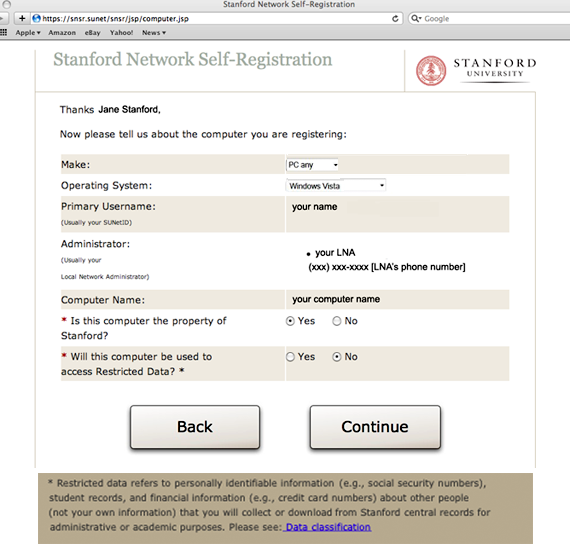
- On the next page, the system will auto-fill your SUNet ID, LNA (or other administrator), and your computer's unique identifier. Answer the last two questions about your computer name and then click Continue.
Note: Read the paragraph at the bottom of the screen concerning Restricted Data. If your computer will be used to access Restricted Data, click the Data classification link at the bottom of the screen to learn more.
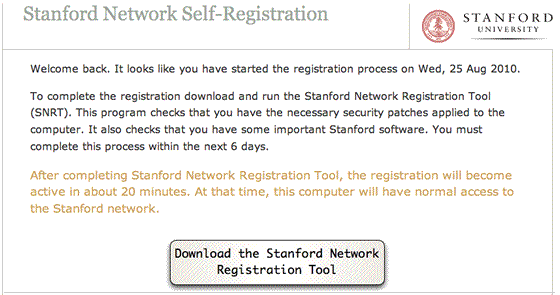
- If you started the self-registration process in the last 7 days but did not complete it: You will see a page welcoming you back, along with the date you started the process. Click Download the Stanford Network Registration Tool.
Note: You have 7 days to complete the registration process.
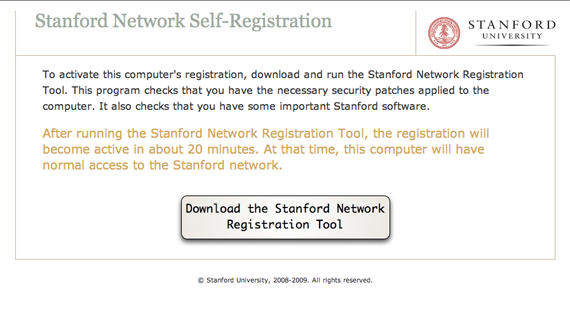
- If you have not started the self-registration process in the last 7 days: Click Download the Stanford Network Registration Tool.
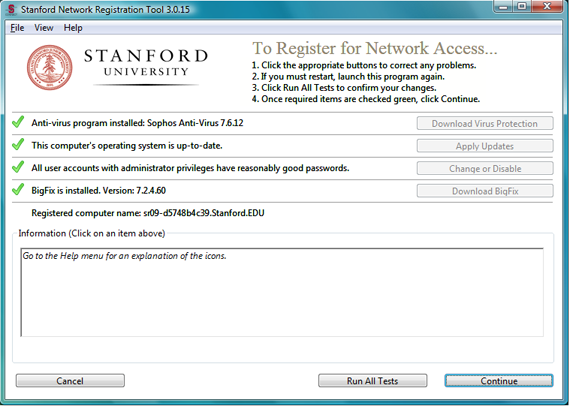
- Open the installer package to install the software. If any of the checks fail, click the button to the right in order to take the appropriate action to correct the problem.
Note: If you need to install any patches that require your computer to reboot, you will need to rerun the Stanford Network Registration Tool after rebooting to verify that your system now passes that test. For computers that need a number of patches, it is not uncommon to have to do this a few times. (On average, installations take about a half hour; however, if your computer requires a large number of operating system updates, the process could take up to several hours.) - Once the software is installed and the program has run its checks on your computer, a diagnostic page is displayed. Click Continue.
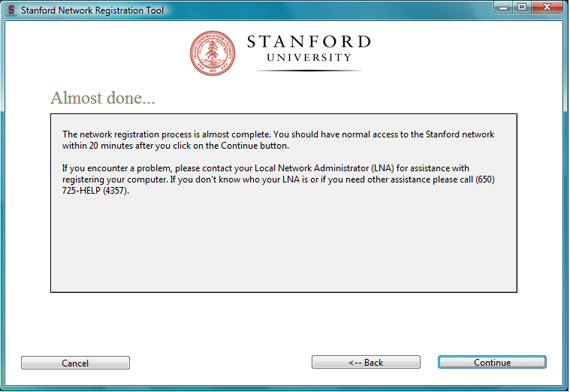
- When the Almost done page is displayed, click Continue.
- A message is displayed when registration has been successfully completed. Click OK.
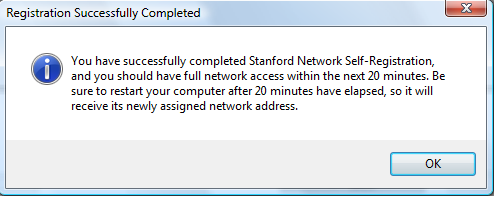
- After approximately 20 minutes, restart your computer so it will receive its newly assigned network address.
If you are unable to self-register, or if you have questions about the process, contact your Local Network Administrator (LNA), Student Technology Specialists, or submit a Help ticket. See Getting additional help at the end of this page for details.
Connect to Stanford's wireless network
Note for Windows 10 users: Do not turn on the Random Hardware Addresses feature. See Windows 10 Known Issues for more information.
- Make sure that your wireless radio is turned on. Some laptops have a switch on the front or side that lets you enable and disable the wireless connection and other laptops use a keyboard shortcut to do this.
- Click the network icon (
 or
or  ) in the notification area.
 - Under the Wireless Network Connection section, click Stanford and then click Connect.

Getting additional help
You can contact the Stanford IT Service Desk via a Help ticket for consulting help. Or, contact your department's Local Network Administrator (LNA).
Students: Contact Peer Technology Specialists.
You will need to provide your LNA or RCC with your MAC address. Here's how to find it:
- Click the Windows Start button.
- In the Search box, type cmd and then press ENTER.

- At the C:\ prompt, type ipconfig /all and press ENTER.
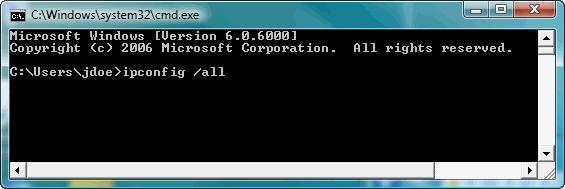
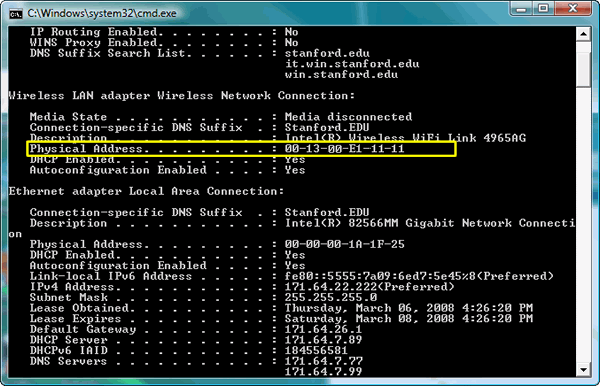
- The next screen displays information about the adapter for your wireless network connection. Your twelve-digit, hardware MAC address is in the Physical Address field. Write down the Physical Address.
You will probably see physical addresses for more than one adapter. Make sure that you note the physical address of your wireless network connection. You may have to scroll to find the wireless adapter.In the following example, the hardware MAC address is
00-13-00-E1-11-11.
Note: Your computer will not be able to access the Stanford's wireless network until your wireless adapter information has been entered in NetDB. - At the C:\ prompt, type exit to close the window.
